Hi there!
Thanks for bringing home our ursine bb's to let them romp around with you!

Before you continue, here's some important stuff to note about animesh, which is what these are...
- Animesh requires an animesh capable second life viewer.
You can download the latest SL viewer here.
Or check out third-party viewers here. - Animesh can't be resized. This isn't our choice; it's a second life thing. Sorry!
- You can only wear one animesh object at a time.
... unless you have a premium account, then you can have two.
Again, this isn't our choice; it's a second life thing. Sorry!
When you make a change that's important to note, it will let you know in local chat with a private to you (owner) message.
Mounts
The mount pack of the bears includes attached and rezzed adult bears with saddles, as well as a held cub that ride piggy back on your avatar's shoulders.
Each needs it's own corresponding HUD, but for our purposes in these instructions, we'll use the mount HUD for explanations.
Each needs it's own corresponding HUD, but for our purposes in these instructions, we'll use the mount HUD for explanations.

The name palette lets you give your animal (the one you've clicked to work with or your worn companion) a floating text name.
Set - Set the text
Clear - Erases any existing floating name
Colors - Change the color of your pet's name
2. Sound
Turn your animal's sounds on or off.
Green for on, Red for off.
Turn your animal's sounds on or off.
Green for on, Red for off.
3. Rider Positions
These buttons control where you are situated sitting on the mount.
** These buttons DO NOT AFFECT worn mounts**
To move your position with the worn ones, simply move the object with in-world editing tools to where you'd like it to be. You can adjust your avatar height independently afterwards if the bear is sinking into the ground or floating to have it match the ground level.
To change a rider's position:
- Choose L (left/driver) or R (right/passenger)
- Choose L (left/driver) or R (right/passenger)
- Use the arrow buttons to move your chosen rider up, down, forward or back on the Z or X axis.
If you are unsure of which direction axis you're affecting, change your camera position to match the perspective of the illustration on the HUD, then press arrow buttons.
If you are unsure of which direction axis you're affecting, change your camera position to match the perspective of the illustration on the HUD, then press arrow buttons.
- You can reset the position by clicking the circular arrow button underneath the matching label.
***AN IMPORTANT NOTE ABOUT AVATAR ANIMATIONS***
More importantly however - you must grant the mount animation permissions when first seating on it. It will not ask you again for as long as you ride it. If you deny permissions, the mount cannot animate your avatar and you may end up looking a bit silly.
You can hop off and back on to try again with permissions.
4. Permission
Permission controls only work with REZZED mounts. Worn mounts can only be controlled by the person wearing them.
While seated on your REZZED mount, click either ALL or OWNER to change who can get on and move the mount.
If ALL, anyone will be able to.
If OWNER, only you as the owner will be able to.
5. Animations
Your animal can perform two animations.
Click the red rectangle ▇ to eliminate that animation from your pet's animation cycle.
Click the green triangle ▶ to force that animation to immediately play and restore it to the animation cycle.
6. Textures
Your adult bears can change both fur and saddle textures.
Click on the texture you wish to apply to your attached mount and it should immediately apply.
You must be riding a rezzed mount to apply textures or change any features on it.
Companions & Wanderers
There are only two notable differences on the companion/wanderer HUD when compared to the Mount HUD, so please refer to the guide above for the rest of the HUD's functions.
1. Wander Menu
It is important to note that your wanderer MUST BE SELECTED and have the selection particle floating above it as pictured above for it to register any commands from the HUD.
To start, with the HUD attached, click on the wanderer you want to work with.
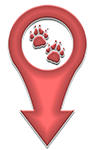
This will make a particle appear over top of one of your animals on the parcel that looks like the one to the right.
This icon will continue to float over top of your animal until you are finished with its options and turn it on.
With your chosen wanderer selected, as reflected by the particle over top of it, you can then change...
- Phantom: whether your animal can physically push avatars and other physical objects around or not
- Radius: click a number that represents how far in meters your animal can wander from where you turn it on.
- On/off: green turns your wanderer on, red stops it and returns it to its starting point
An important note regarding wanderer/posed animal functionality:
When you click to select the wanderer you are working with (or posed animal) that selection will stay active for 10 seconds. You can only change options on that item within that 10 second time frame and the selection particle will be active to reflect that. With every button you click to change that reindeer you currently have selected, the selection 10 second limit will refresh.
Please make sure you have your desired item selected when you go to press buttons!
2. Phantom
Toggle your pet's 'phantom' status (collision, off means it can push you around)Green for on, Red for off.
Click the green triangle ▶ to force that animation to immediately play and restore it to the animation cycle.
Your adult bears can change both fur and saddle textures.
Click on the texture you wish to apply to your attached mount and it should immediately apply.
You must be riding a rezzed mount to apply textures or change any features on it.

There are only two notable differences on the companion/wanderer HUD when compared to the Mount HUD, so please refer to the guide above for the rest of the HUD's functions.

1. Wander Menu
It is important to note that your wanderer MUST BE SELECTED and have the selection particle floating above it as pictured above for it to register any commands from the HUD.
To start, with the HUD attached, click on the wanderer you want to work with.
This will make a particle appear over top of one of your animals on the parcel that looks like the one to the right.
This icon will continue to float over top of your animal until you are finished with its options and turn it on.
With your chosen wanderer selected, as reflected by the particle over top of it, you can then change...
- Phantom: whether your animal can physically push avatars and other physical objects around or not
- Radius: click a number that represents how far in meters your animal can wander from where you turn it on.
- On/off: green turns your wanderer on, red stops it and returns it to its starting point
An important note regarding wanderer/posed animal functionality:
When you click to select the wanderer you are working with (or posed animal) that selection will stay active for 10 seconds. You can only change options on that item within that 10 second time frame and the selection particle will be active to reflect that. With every button you click to change that reindeer you currently have selected, the selection 10 second limit will refresh.
Please make sure you have your desired item selected when you go to press buttons!
2. Phantom
Toggle your pet's 'phantom' status (collision, off means it can push you around)Green for on, Red for off.
Companions/Attachables: How-to and Important Notes
Companions do not come with any product-specific functions, but there are some important things to note.
Companions must attach to your "Avatar Center".
You could attach it to your hand or something, but then the animal will flail and move wherever your hand goes and that's gonna be a bit crazy. So hey, if you need to reset where your animal is attached, right click it in your inventory, hover over "Attach to" choose "Avatar Center".
This will allow you to move your animal into a position where it can walk and move alongside of your avatar. It's best to get the animal even with the ground, even if your avatar is floating in its animations. You could have the animal float in the air, but again, kinda weird. You do you, though!
You can ONLY have up to 2 animesh items attached, if you are a premium SL member. The limit is only 1 if you have a free account. Please be aware this is NOT our choice - this is a limit enforced by Linden Lab. You could choose two animals, but if you have two companion animals attached, the HUD will affect them *both*.
If you want to give your companions a name or customization option, we recommend you attach them one at a time to change their textures and name them. Once you're done, wear them both and bam, you're good to go with your new buddies.
Decor Pack: Important Notes
Just like the wanderers, you must have the Posed Pack HUD attached and click on the object you want to work with before it will respond to HUD commands. You will need to see the particle floating above the object.
When you click to select animal you want to work with, that selection will stay active for 10 seconds. You can only change options on that item within that 10 second time frame and the selection particle will be active to reflect that. With every button you click to change that animal you currently have selected, the selection 10 second limit will refresh.
Please make sure you have your desired item selected when you go to press buttons!
Thank you for bringing some of our pets home with you!We hope you enjoy them as much as we have enjoyed making them.
If you need assistance with your purchase, please contact our store account (jiansl resident).❤ Kalia & Ashur (& Tricky, too)
If you need assistance with your purchase, please contact our store account (jiansl resident).
❤
Kalia & Ashur (& Tricky, too)